Fertility yoga: Asana and beyond [free online videos]

fertility yoga

One of my readers recently sent me a message asking about yoga for fertility. Admittedly, I’m not certified in pre-natal yoga, but I do know a few amazing teachers who are.  Jill Petigara, literally wrote the book on yoga and fertility.  Her book, Yoga and Fertility: A Journey to Health and Healing, delves into the role yoga can play in helping women conceive.

The book can be a great guide for soon-to-be-moms, and it includes exercises they can do at home. However, if you ARE trying to get pregnant, I highly recommend you find a yoga instructor or workshop that specializes in yoga and fertility.  A certified pre-natal instructor, particularly someone who specializes in fertility yoga can help guide you though an optimal practice for you. Of course, check with your doctor before starting any kind of exercise program.

If you can’t find a class specific to fertility, a restorative yoga class is a great place to start.  Many of the same poses are integrated, and the class is a gentle, nurturing, ‘restorative’ environment.  That said, there are some things in addition to the physical poses in yoga to help with fertility.

Trying to get pregnant can be stressful and emotionally trying, so it’s a perfect time to begin a meditation practice. A daily meditation practice, even for five minutes can help reduce stress and balance emotions and hormones. Keeping a journal to unburden yourself of intrusive thoughts also helps. You also may want to try acupuncture and massage.

Fertility Yoga & Meditation Videos

To help you along with your home practice, here are a couple of videos as you journey toward pregnancy and motherhood.

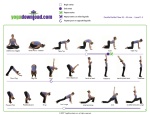
Yoga poses that aid fertility


Fertility Meditation through the Chakras

The most important thing to remember during this time is to let go of all self-judgement. Be kind to yourself, nurture yourself, and allow any emotions that arise to be.  Accept them. Breathe.

Namaste.

– Your Charmed Yogi

Photo: Joyful Birth Babies

Related content:

Favorite Pose Friday: Camatkarasana (Wild Thing)

wild thing yoga pose camatkarasana

I love the freedom and openness that Camatkarasana or ‘wild thing’ brings to a yoga practice.  Talk about a pose that allows you to find your edge, and build trust in yourself.

A balancing pose, back bend, strength builder, core strengthener, chest opener, and heart opening pose all one, wild thing is one of my favorite poses.

As always, begin with some sun salutations to warm up the body, and build up to Camatkarasana with poses to stretch and strengthen key muscle groups used in this pose such as: low lunge, standing forward fold (Uttanasana), extended side angle pose (Utthita Parsvakonasana), cobra pose, (Bhujangasana), bow pose (Dhanurasana), and side plank pose (Vasisthasana). Continue reading

Favorite Pose Friday: Savasana (7 variations)

Savasana quote

Aaah, the pose of all poses, Savasana.  It’s truly perfect for any occasion, and your Savasana can be whatever you want it to be.  Also know as ‘corpse pose’ (not a fan of that nomenclature), it’s the final resting pose we come into at the end of our yoga practice, and there’s more to it than lying flat on your back.

For many people, lying still – even for five minutes, is very difficult.  So, it’s important to find the perfect position for you, so you’re not thinking about discomfort in the body; allowing you to let go.

Traditionally, we’re taught to lie flat on our backs with our arms by our sides palms face up to receive our practice and allow our nervous system to settle.  And this is a wonderful way to teach it, and I often cue students to take Savasana this way.  However, most of the time in my classes, I’ll cue students to make their way into whatever version of the pose allows them to surrender.

Every body is different.  We all have our own issues or pain points (physically and emotionally).  For someone with a breathing disorder (like me) lying flat on my back makes it difficult to breathe.  If you’re late in your pregnancy (third trimester especially), you should avoid lying flat on your back for an extended period of time in order to avoid uterine pressure on the vena cava vein (which carries blood back to the heart for oxygen from your legs and feet).  Side sleeping is generally recommended in this trimester as a result.

If you have low back pain, it helps to have a bolster or blankets under your knees during Savasana.  So, knowing that everyone may have different needs physically so that they can let go emotionally, here are 7 different variations of our favorite final resting pose.  I love the graphic images courtesy of Nina at Yoga for Healthy Aging blog.

The first variation involves adding a folded blanket to support your head.  This is great if you have tight shoulders or chest, or just like to have a little cushion under your coconut. Be sure the support under your head is firm (not soft) and that your shoulders are touching the ground (not the support). Ideally in Savasana, your chin should be pointing slighting down toward your chest (not tipping back away from it).

Savasana with Head Support

Savasana with Head Support

This second variation (I mentioned above) provides support behind your knees, and it’s great if  you have lower back problems or find it more comfortable to rest your back flatter on the mat. You can use a bolster (as shown below) or a couple of folded blankets.

Savasana with Knee Support

Savasana with Knee Support

The third variation of Savasana is great for a home practice when you have access to a chair to support your calves.  This too provides relief for low back pain, and because it’s an inversion, it improves circulation and helps you relax.  Place a blanket or two on the chair so you can be comfortable, and you may choose to make a T-shape out of a couple other blankets for a nice supported chest opener, and head cushion.
Savasana with Chair Support

Savasana with Chair Support

The fourth and fifth variations are restorative versions of Savasana, that use blankets and bolsters to support your torso and head. One version uses a bolster under your torso, and the other a stack of two folded blankets. These versions can help open the chest and lungs for better breathing and they just feel amazing.   Before lying back onto the bolster, make sure you’re seated on the floor with the edge of the bolster at your low back.  You may need to play with the position a bit if the curve in your back is too much.

Restorative Savasana (Bolster Supporting Torso)

Restorative Savasana (Bolster Supporting Torso)

Restorative Savasana (Blankets Supporting Torso)

Restorative Savasana (Blankets Supporting Torso)

The sixth version of Savasana is my favorite.  Whether I start there or not, I usually end up here lying on my side.  This is great for when I’m having trouble breathing, and it’s also a good option for for pregnant women. It’s best if you can have support both under your head and between your legs.  If you can have an extra blanket or pillow to hug, even better.

Side-Lying Savasana

Side-Lying Savasana

The  last version is Crocodile pose (Makrasana) is great if you tend to feel anxious or vulnerable lying on your back and feel more comfortable if your front body is protected. If this pose is hard on your lower back, you can also grab a bolster and come into supported child’s pose.

Crocodile Pose (Makrasana)

Crocodile Pose (Makrasana)

Whether or not you find Savasana easeful, you may want to try one of these variations to see how your body responds and if you’re allowed to surrender further into final relaxation.

And if none of these work, make your own variation.  Do what’s right for you so that you can give yourself at least 5 minutes to receive your practice and let go of what doesn’t serve you.

Do you have a version of Savasana that you’d like to share?  Let me know here!

Namaste.

– Your Charmed Yogi

(Featured image: Quizio)

Related posts:

Favorite Pose Friday: Bridge Pose (4 variations)

bridge pose setu bandha sarvangasana

Setu Bandha Sarvangasana (bridge pose) is a go to pose that can help solve any number of problems.  From developing strength in your core and glutes (which helps alleviate low back pain) to opening the chest, bridge pose is a must if you don’t already incorporate it into your practice. There are so many variations, it’s accessible by nearly everyone.

What’s in a name?

If we break down the Sanskrit name for bridge pose, Setu Bandha Sarvangasana;  Setu means bridge or dam, Bandha meaning lock. And the meaning of Sarvanga is support. The Bandha or ‘lock’ in this pose is at the throat, is Jalandhara, the throat energy valve. Bridge pose involves bringing the chest up to the chin and extending the upper thoracic at the same time. In addition to the physical benefits of this lock including stimulating the thyroid, Jalandhara connects the head with the heart by opening the throat chakra, helping us establish balance between body and mind, and enabling us to live our truth.

What are the benefits of bridge pose?

  • There are a number of ways bridge pose can help us develop strength or alleviate ailments including:
  •  Toning the butt (when glutes are active)
  • Teaches inactive glutes to fire
  • Strengthens spinal muscles
  • Strengthens hamstrings
  • Enhances digestive system and stimulates abdominal organs.
  • Provides relief for menopausal symptoms.
  • Builds pelvic floor strength
  • Improves circulation
  • Strengthens low back by developing core stability
  • Stimulates thyroideka pada setu bandha sarvangasana one legged bridge pose
  • Opens lungs for better breathing
  • Opens heart & throat chakras

Who should not do bridge pose?

Anyone with neck or knee injuries or issues should avoid bridge pose.  However, if you have issues with your knees, you may be able to do supported bridge with.  Also, women who are menstruating should avoid inversions, of which bridge pose is one, although supported bridge will help alleviate menstrual discomfort. Pregnant women should avoid inversions or lying on their back for too long. Once you hit the second trimester, the increased weight of your uterus while lying on your back interferes with the flow of blood and nutrients to your developing baby.

Getting into bridge pose

From lying on your back (supine), bend your knees at ninety degrees and place your feet flat on the floor, hip width apart and parallel. You may choose to have a folded blanked under your shoulders to support your neck.  I start with the knees at a ninety degree angle to see if there are any sensitivities. Eventually you’ll want to move your heals closer to your buttocks.

Arms are by your sides with your palms facing down. As you exhale, press your inner feet and arms actively into the floor, and your pelvis up toward the ceiling. Firm and lift the buttocks off the floor.  Be sure to keep your legs parallel and not let your knees splay apart.

To take the pose deeper, you can roll your shoulders and chest open, and clasp your hands under your pelvis and extend through the arms to help you stay on the tops of your shoulders.

Lift your buttocks until the thighs are about parallel to the floor. Keep your knees directly over the heels, but push them forward, away from the hips, and lengthen the tailbone toward the backs of the knees. Lift the pubis toward the navel.
Don’t move your head from side to side, but gently lift your chin way from the sternum slightly and open your chest by pressing the shoulder blades into the floor. This will allow you to press the top of the sternum toward the chin. Keep firming the outer arms, broadening the shoulder blades, and lifting the chest.

Hold the pose for 30 seconds or a minute if you can, and release with an exhale, rolling the spine one vertebrae at a time onto the floor.

Bridge pose variations

supported bridge poseIf you want to take your bridge pose to the next level, you can try Eka Pada Setu Bandha Sarvangasana one one-legged bridge pose.

Supported bridge pose using a block and a strap allows you to relax in the pose for an extended period of time.  For supported bridge, place a strap around your thighs to keep the knees from falling open, and a block under your sacrum to rest your weight on. One of my students has called this version of the pose, “delicious.”

In what I call an ‘alignment variation’ you can use blocks to become familiar with proper alignment for your legs and feet.

To prevent your legs from turning out when you come into the pose, place a block flat on the floor between your feet (in whichever position keeps them hip-distance apart) and keep the inner edges of your feet alongside the block as you come into the pose.

Place a second block between your inner thighs (in whatever position keeps your knees hip-distance apart) and squeeze the block with your legs enough to keep the block in place as you exhale into the pose.

In a coming post, I’ll talk about what it means when your glutes aren’t firing, and bridge pose is critical to helping your body relearn what it’s forgotten.

Happy bridging!

Namaste.

– Your Charmed Yogi

(Photos: Yoga iSportPreventionDo Restorative Yoga)

Related posts:

More yoga for runners [3 videos]

Yoga runner

If you’re training for a 5K, 10K, marathon or even a triathlon you’ll want to incorporate exercises that lengthen the muscles as well. Yoga is a great way to bring balance to your training. Physically, yoga is a great compliment to your conditioning. Mentally, it can help you learn to cultivate calm when you’re on the road. If you can learn to remain present and breathe through challenging poses like holding warrior 2 (virabhadrasana), you can learn to breathe through the ‘rough spots’ at mile 8.

Runners are go-getters by nature, so a word of caution when beginning a yoga practice. Like with anything else, start slowly. Ease into poses that you’ve never done before. Accept and understand where your body is today, before pushing it to tomorrow’s limits. Find your edge and hover. Plus, if you regularly pursue classes that push you to a drenched sweat, yoga what you need to introduce balance.

While yoga may not be the cardio blast you’re looking for, it will help you gain flexibility, tone, lengthen and strengthen key muscles to support your trek.

You can start with just a few poses a day, or you can add a regular routine designed just for runners into your week. Here are 3 yoga videos designed specifically for runners.

Mini Practice with Esther from Eckhart Yoga (8 minutes)

Pre-run with Fiji McAlpine of DoYogaWithMe.com (23 minutes)

Post-run with Fiji McAlpine of DoYogaWithMe.com (20 minutes)

Prevent getting sidelined by pain or injury and cultivate balance by integrating yoga into your training. Are you a runner who’s incorporated yoga into your training? Let me know about it here!

Namaste.

– Your Charmed Yogi

(Photo: Moksha Yoga)

Related posts:

Favorite Pose Friday: Baby bakasana (crow)

baby bakasana

Happy Favorite Pose Friday! Are you crowing for a new pose to switch up your arm balance practice?  If so, you may want to give baby Bakasana a try.  Oddly enough, this is less of a variation of Bakasana or ‘crow pose’ and more a modifed version of Karandavasana or ‘duck pose’. And, contrary to its name, this is an intermediate to advanced pose as it requires core strength and arm strength so you’re not using your shoulders to hold your weight.

The first time I tried this pose, it felt weird and wrong because it’s such a small pose.  It kind of resembles the first face plant I ever did in Bakasana, but once I got into the groove I just had fun with it.  That’s what yoga is meant to be more than anything, an enjoyable process not torture or self-flagellation.

Here’s the how-to from Kathryn Budig of YogaGlo in Yoga Journal.

Step 1:

Start in a squat balancing on the balls of your feet with your big toes touching. Separate your knees and walk your hands out in front of you until your arms are straight. Reach your forehead down toward the ground as you lengthen your heels toward the mat behind you. Take a few breaths.

Step 2:

Staying low, walk your hands in and place your forearms onto the mat parallel to each other. Wrap your knees around the upper outer edges of your arms. Spreadyour fingers evenly and press down on both sides of the wrists. Keep your gaze just in front of your finger tips to protect your neck, and  lean forward keeping the knees actively hugging around your arms.

Step 3:

Continue to learn forward so your face gets closer to the ground. It will feel as though you are folding your biceps onto your forearms. Your elbows will stay flat the entire time. Once you lean forward, resist the weight of the legs on your arms by hugging the shoulders.  Point just your left foot (you’re so close to the ground you won’t be able to lift it, just point). And don’t forget to keep your abs pulling in.

Step 4:

Round your upper back deeply as if you could sprout wings out of your shoulder blades. Continue to squeeze your knees around your arms as you lean forward a pinch more and point your second foot so both feet are now off the ground. Keep rounding your upper back, firming your elbows down, pulling your abs in, gazing slightly forward without any strain in your neck. Spread your toes and hold for 5 breaths then release your feet to the ground.

Fly little crow, fly!

Namaste.

– Your Charmed Yogi

(Primary image: Tumblr/Inhale Exhale)

Related posts:

Favorite pose Friday: Supported bow pose

Let’s face it back bends are hard, and they’re not for the impatient yogi.  Warm ups and preparation are key to preventing injury and facilitating a healthy opening.  They’re about lengthening the muscles in the front of the chest, opening the heart chakra, and strengthening (not compressing) the back.  I can find both resistance and surrender in a back bend depending on how I approach it.

Like many people, I have overdeveloped (tight) chest wall muscles from working at a computer most of the day;  an anterior pelvic tilt which means I have a more pronounced arch in my low back; and a history of SI joint issues.  So gentle back bends help to strengthen my lower back muscles to better stabilize my pelvis and sacroiliac joint, while allowing me to lengthen and open my chest muscles which rolls my shoulders back and alleviates overstretching in my upper back.

But because of the arch in my low back, I have to approach back bends cautiously, so I focus on tilting my pelvis to lengthening the front of my body and extend out of my low back to bring the curve more into my upper back.  There are more than just back muscles involved.  My hip flexors, quadriceps, adductors, and iliopsoas need to be open enough to avoid compressing the lumbar region and putting pressure on the SI joint.

For me, gentle back bends have been tremendous in alleviating low back pain, specifically and I recently discovered a version of Dhanurasana (bow pose) that involves the placement of a bolster under the hip bones for support. In the post, “Better Backbends” in the Yoga Journal, Jason Crandall explains:

Dhanurasana I: Bow Pose

Propping: Place a bolster horizontally underneath your lower abdomen.

Why This Works: It keeps the front rim of your pelvis lifted and your low back long. The support of the bolster makes it easier to lift your chest and open your upper back.

How to: Place a bolster horizontally across the middle of your sticky mat. Lie face-down over the bolster so that your hip points touch the edge of the bolster that’s nearest to you. Place your forearms on the floor as though you were doing Sphinx Pose.

The placement of the bolster is key in this variation, and you’ll sense whether you’re in the right spot when you come all the way into the pose. If your hips are too far back on the bolster, you won’t feel that the bolster is helping you rock your pelvis in the appropriate direction. If your hips are too far forward on the bolster, you’ll topple forward once you hold your ankles in Bow Pose.

Follow the cue that you are receiving from the bolster and gently engage your abdominal wall; this will help you continue tilting your pelvis backward. Exhale, bend your knees, and reach back to hold the front of your ankles. If you feel yourself falling forward, simply adjust your position on the bolster.

Observe the deep opening of your chest and shoulders while your lower back arches mildly. Although it may be challenging to breathe as your diaphragm presses the bolster, take 3 to 5 breaths before releasing the pose.

Since discovering this pose and introducing it to my students, they agree that this version of bow allows them to really open their chest without the pinch that can sometimes come from trying to get into a pose before the body is ready.  We ALL want to try to do every pose the teacher tells us, but it’s not always what’s best for our body. So, this is a way to experience a challenging pose without pain and open your heart to a new process.

As with all yoga, pay attention to your body.  If you have high or low blood pressure, migraines, insomnia, or serious lower-back or neck injury you’ll want to avoid bow pose.

Namaste.

– Your Charmed Yogi

(Photo: Yoga Journal)

Related posts: